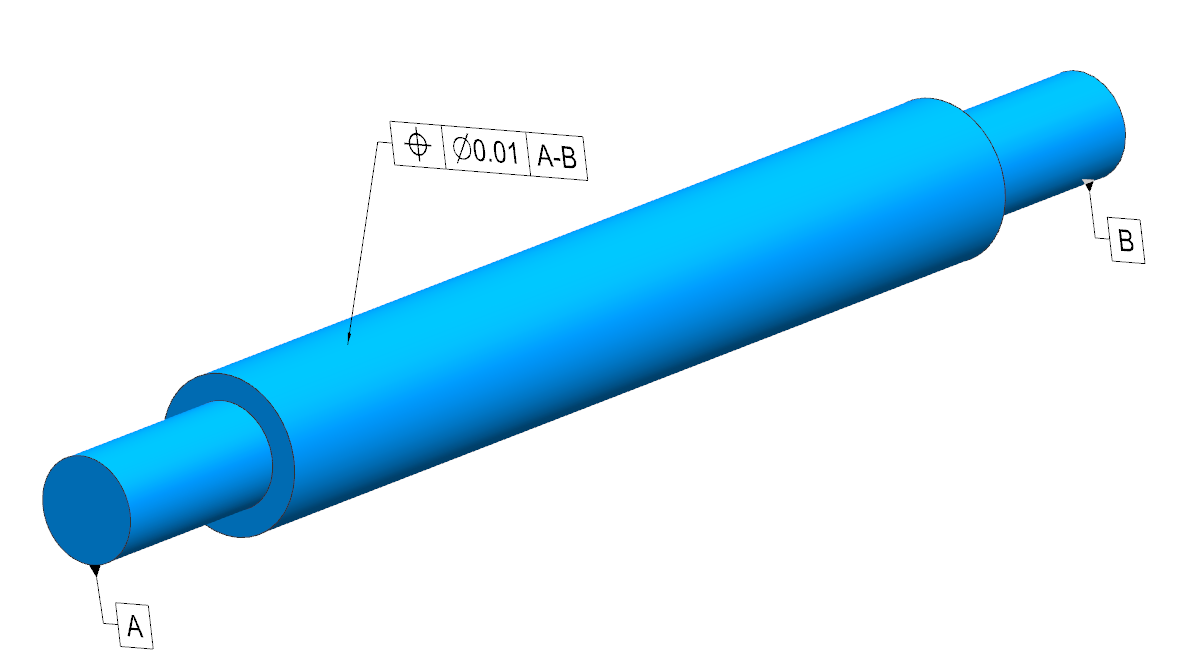
Coaxiality conditions can be vital for shafts supporting heavy and varying loads, such as car and truck axles, electric motors, generators and pumps. There are four different types of tolerances for defining coaxiality controls: Position, concentricity, circular runout and total runout. This post proposes brief and practical definitions regarding which type of tolerance to choose for certain applications as well as the advantages and disadvantages to each. For more information, refer to the ASME standard [1] and other related reference articles [2].
a- Position Tolerance: This is the least limiting coaxiality type. A part can pass even if its local zones are off the center, as long as the axis is within tolerance. However, potential problems can arise if the datum feature is specified with material modifiers. This will virtually guarantee off-center mating. There is no surface form control with position tolerance, so if dynamic balance is important, a maximum material modifier should be avoided when applied to spinning parts.
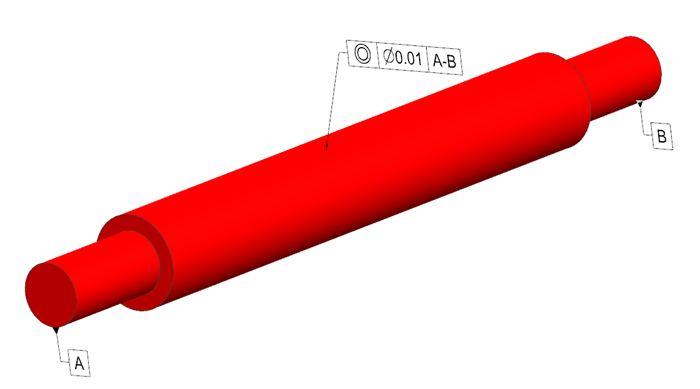
b- Concentricity: This is the equivalent of symmetry tolerance on a cylindrical part. It is typically easier to manufacture than runout controls, since there is no surface form control. In general, this type of tolerancing is useful for inspecting spinning parts. This method becomes costly, however, due to the fact that readings are often coupled with circularity errors.
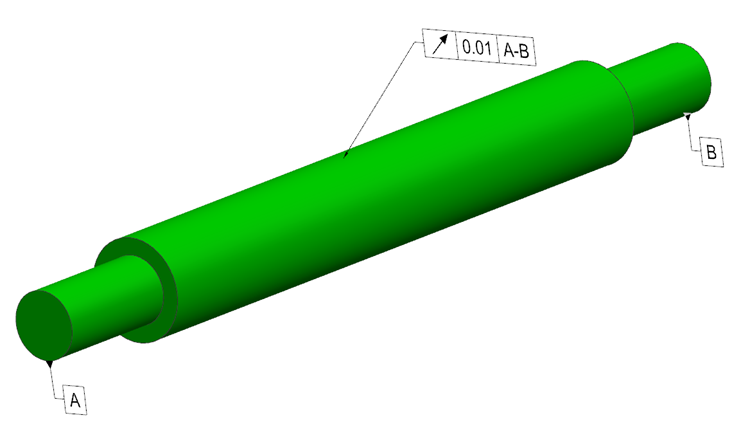
c- Circular Runout: This controls Circularity and Concentricity. The measured points must be contained within two coaxial circles 0.01 apart and coaxial with datum A-B. This type of tolerancing is also good for checking spinning parts. There is surface form control involved. While it is easier to inspect than concentricity, it is also more difficult to manufacture.
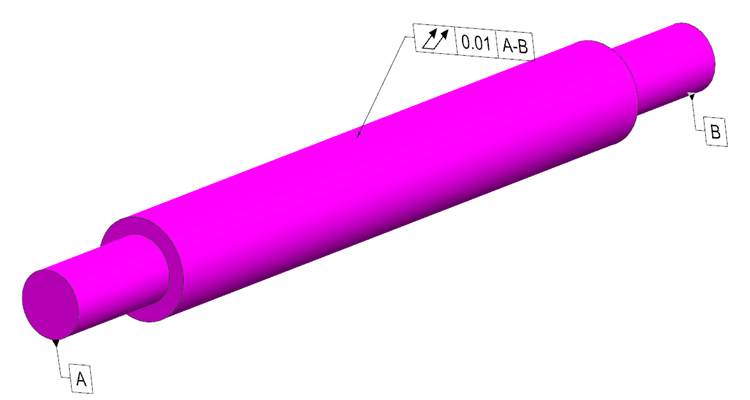
d- Total Runout: Cylindricity + Concentricity. The measured points must be contained within two coaxial cylinders 0.01 apart and coaxial with datum A-B. This type of tolerancing is also good for checking spinning parts. There is surface form control involved. This is easier to inspect than concentricity, but more difficult to manufacture.
The above mentioned tolerance types can be sorted according to ease of manufacturing and inspecting as shown in the below figures.
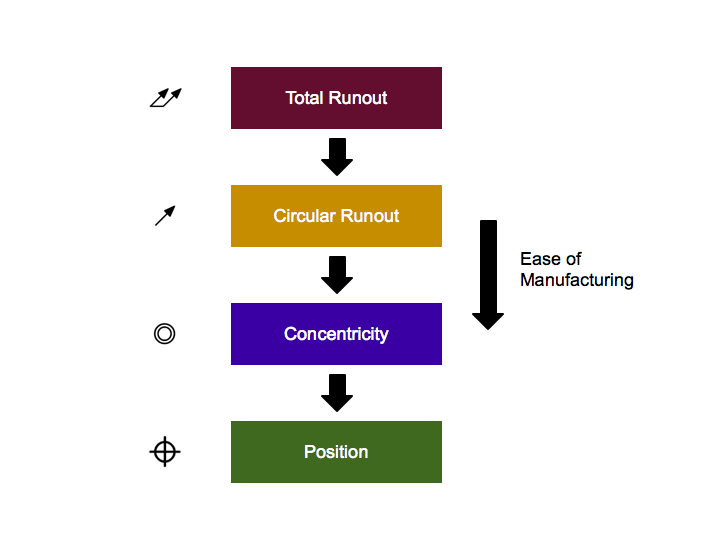
Tolerance types for coaxiality sorted according to ease of manufacturing
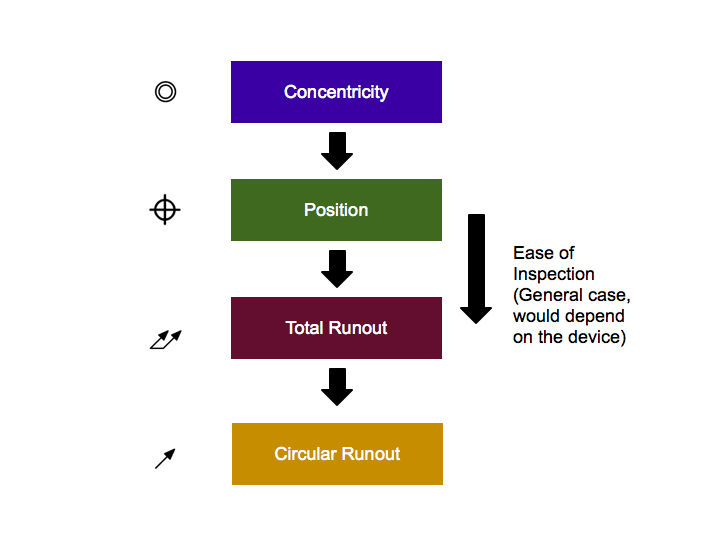
Tolerance types for coaxiality sorted according to ease of inspection (The ease of inspection will greatly depend on the device and setup used; CMM versus portable arm or a more conventional setup with dial gage)
References:
- ASME Y 14.5-2009 , Dimensioning and Tolerancing. New York: American Society of Mechanical Engineers.
- A New Approach for the Effectiveness of Coaxiality Tolerance Verification
- Kaisarlis, C. Provatidis, M. Sfantsikopoulos, (2011) KMUTNB International Journal of Applied Science and Technology
