Ever-increasing research and development in LiDAR technology, and advances in both hardware and software are improving the detail, scale and use of point cloud data. One of these improvements is colorization. Adding color has plenty of benefits when viewing and analyzing point cloud data, particularly in the architecture, engineering, construction and operations (AECO) sector. In this article, we explore the benefits, as well as how to achieve RGB in your point clouds.
What are Point Clouds?
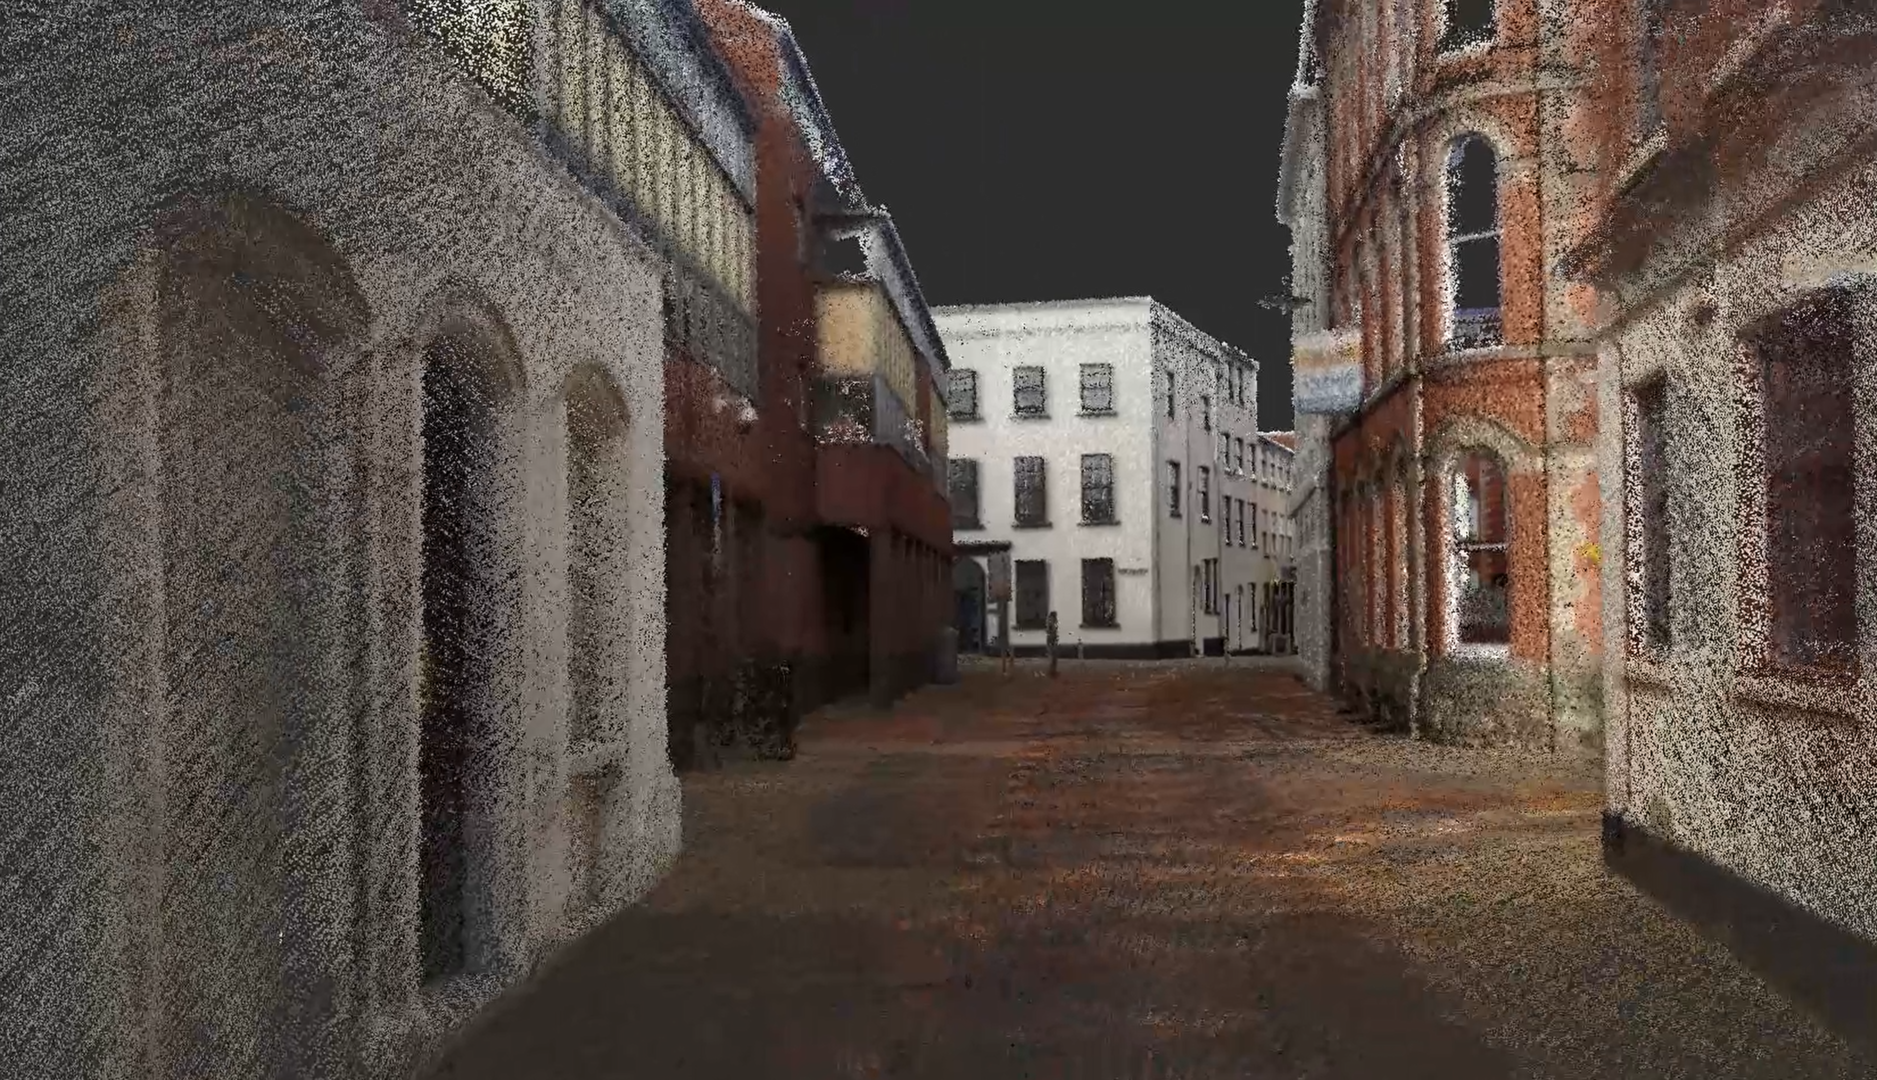
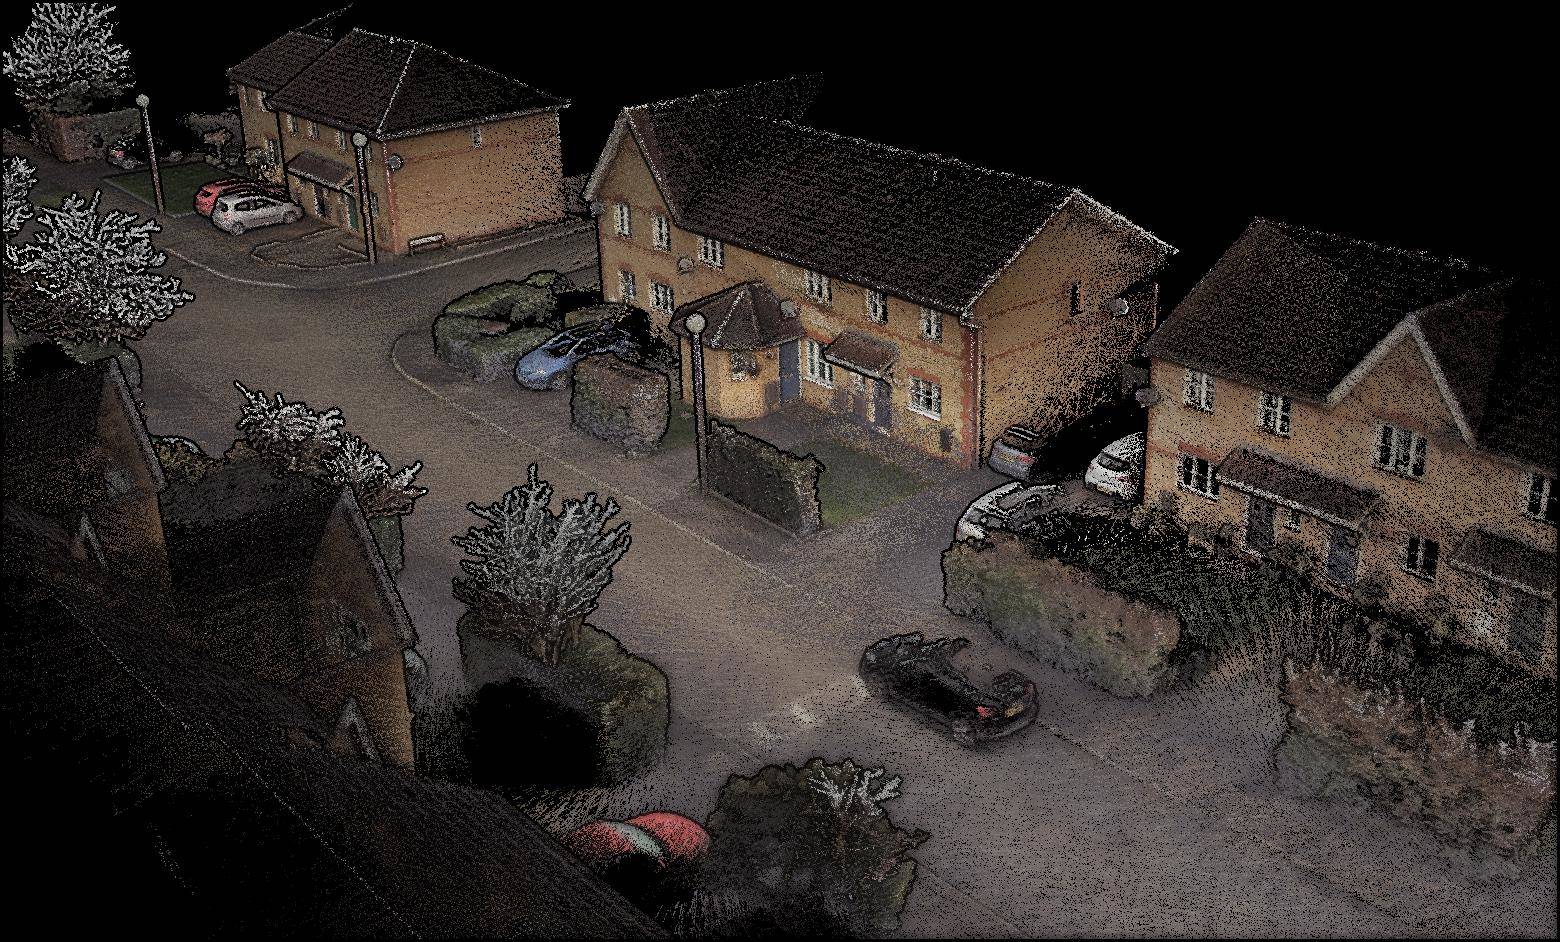
A basic definition of a point cloud is a 3D data set of different points in space. Each point is part of a collection that maps a location, object or area. X, Y and Z values make up standard point clouds, detailing positioning and colorized point clouds containing RGB values for each point.
How to Create a Point Cloud with LiDAR?
LiDAR scanners can register hundreds of thousands of points per second, generating a detailed point cloud. Traditional tripod-based static scanning creates extremely dense point clouds and accurate data. Mobile LiDAR scanners capture data with slightly less accuracy, however, as walking and scanning means there is an increase in the speed of capture.
Both methods have different ways to colorize the final point cloud, providing more clarity from the final data.
Can LiDAR Point Clouds Be Colorized?
In short, yes they can. You can manually assign color through tagging, use photogrammetry data rather than LiDAR to create the point cloud or merge together data from both photos and LiDAR point clouds.
Assigning Color Through Tagging
One way is to assign color manually, by tagging features of your point cloud. This method is great if you need to highlight specific areas without worrying about realism. Identify features such as trees, pylons or telegraph poles across a site, adding a tag to change each to a color choice.
Semi-automate this process by defining the item generally. Alternatively, you can go through and manually define which items carry a certain color. However, there are restrictions on how far you can automate this process depending on the software you use and whether it supports this function.
Photogrammetry Data
Photogrammetry is the process of creating point clouds using photographic images. To get a point cloud from photos you need a fully comprehensive set of photos, covering every angle of the item or area you’re mapping. Photogrammetry relies on light for colorization to work efficiently, so scanning in a dark area will result in a dull point cloud.
LiDAR and Photo Data

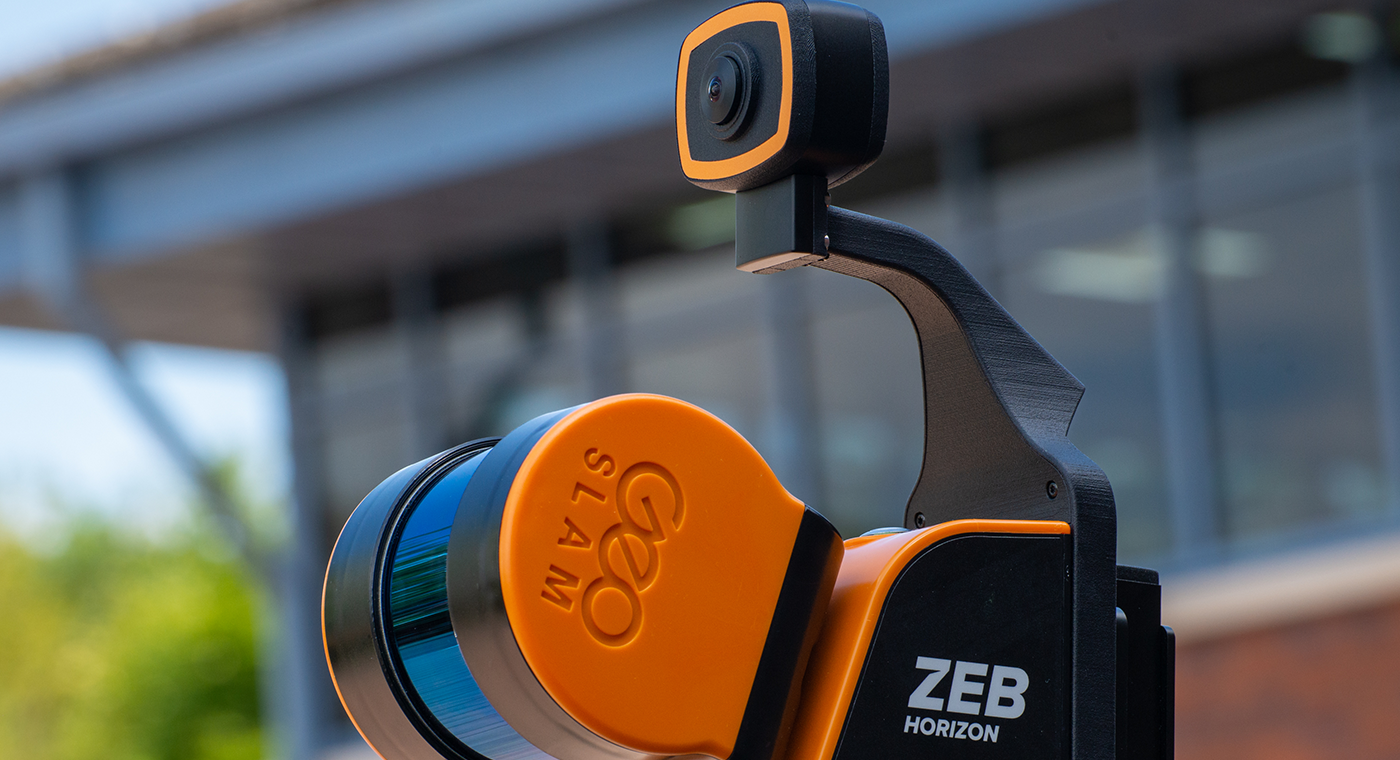
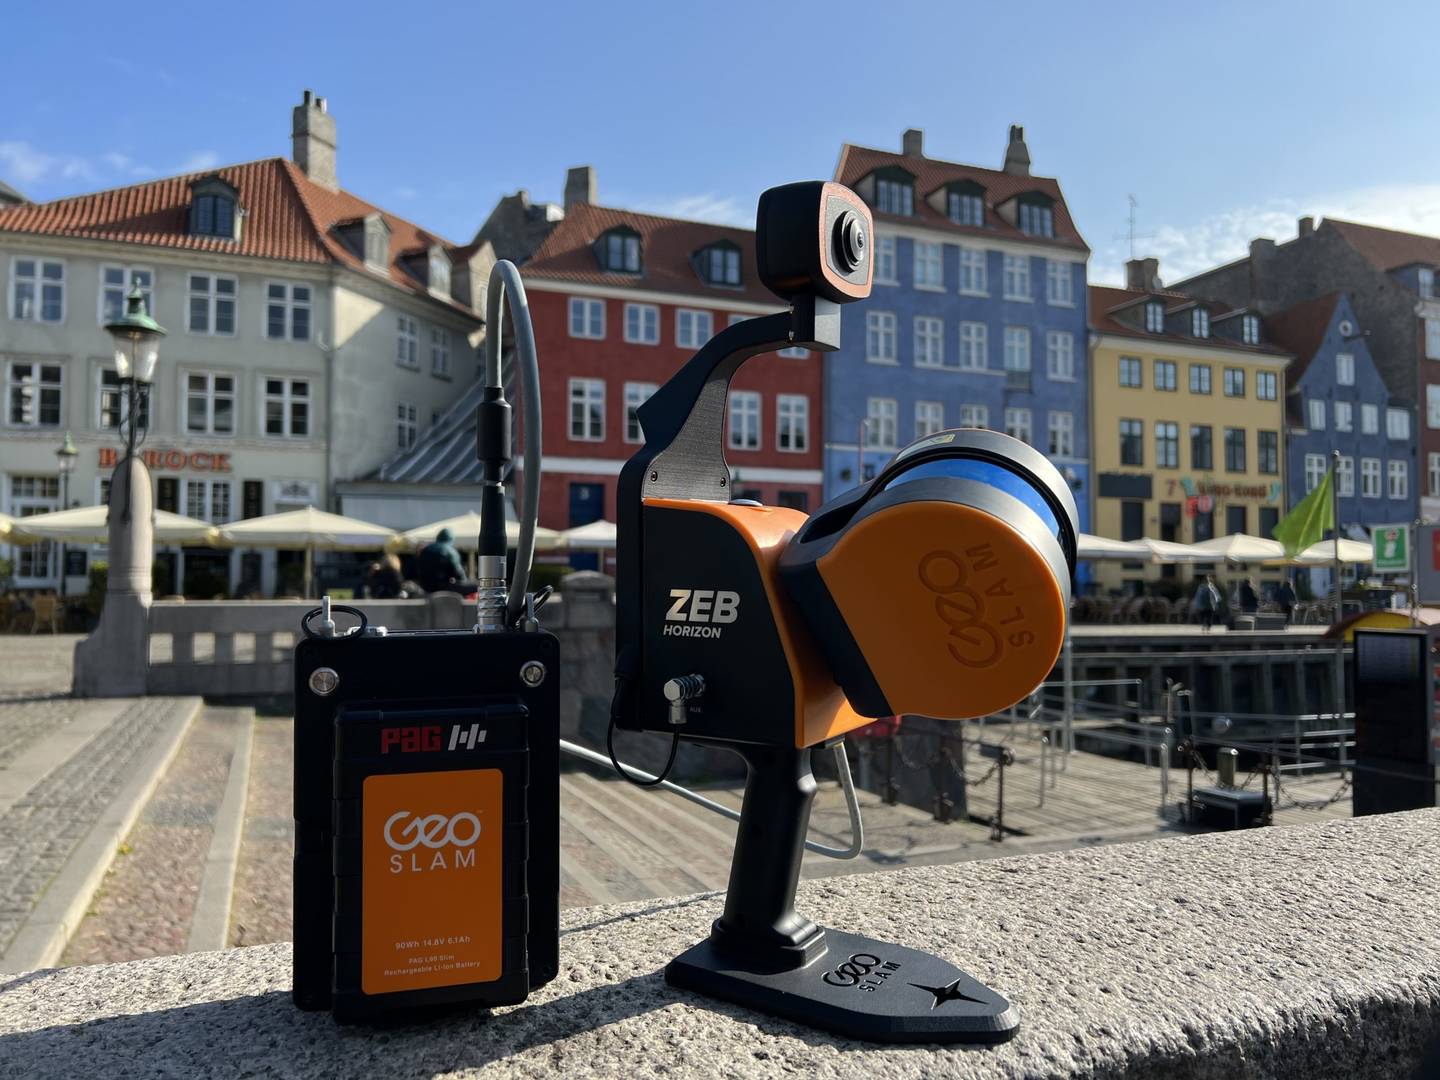
The most accurate way of colorizing a point cloud is to merge images and data together. Perhaps the most reliable way currently available is to use a camera attachment with a LiDAR scanner. This allows for the capture of photograph and LiDAR data simultaneously. Combining the photos with the data creates an incredibly detailed 3D model. The camera and the laser sensor work at the same time, so they have identical timestamps. An RGB value is assigned to a point based on timing or distance from the point when captured.
Why Colorize a Point Cloud?
Standard point clouds are incredibly useful data, but colorization increases their usability further. Though this reasoning applies in most situations, it is particularly useful in AECO.
Adding color to a 3D model provides helpful context. Most construction or engineering projects will involve several stakeholders including some who lack experience in reading plans and schematics or are unable to visit a site.
Colorized point clouds provide greater realism and clarity. For instance, a fire extinguisher would be easier to spot in a colorized point cloud than in a standard point cloud, helping those involved to better interpret the information.